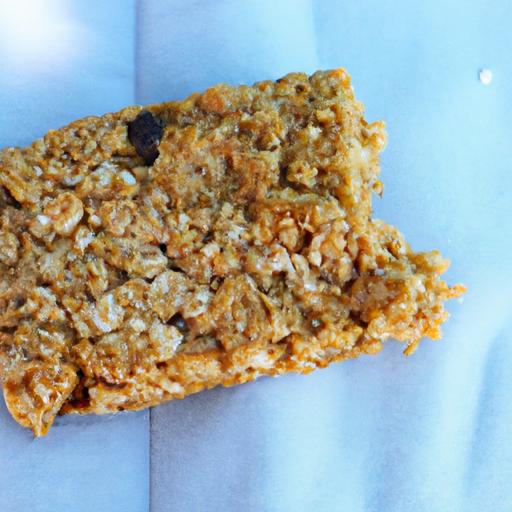
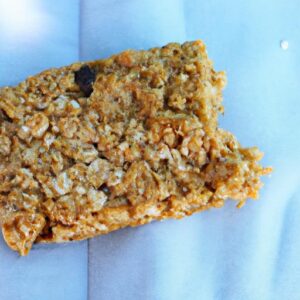
There’s something truly satisfying about biting into a crunchy granola bar that you made yourself-a perfect harmony of wholesome oats, sweet honey, and a medley of nuts and seeds, all packed into one tasty, energizing bite. Forget teh store-bought options loaded with preservatives and hidden sugars; DIY crunchy granola bars let you take control of every ingredient, tailoring yoru snack to fit your taste buds and nutritional goals. In this article, we’ll guide you through an easy homemade recipe that transforms simple pantry staples into a delightful, on-the-go treat. Whether you’re fueling a busy day, prepping for a hike, or just craving a healthy snack, these crunchy granola bars are as rewarding to make as they are to eat. Let’s dive into the art of crafting your own perfect bite of crunchy goodness!
DIY crunchy granola bars start with carefully selecting ingredients that balance texture, flavor, and nutrition. Granola Granola choosing high-quality oats, fresh nuts, and natural sweeteners is key to crafting bars that are satisfyingly crisp yet tender, bursting with flavor in every bite. Granola
Choosing the Perfect Ingredients for Ultimate Crunch and Flavor
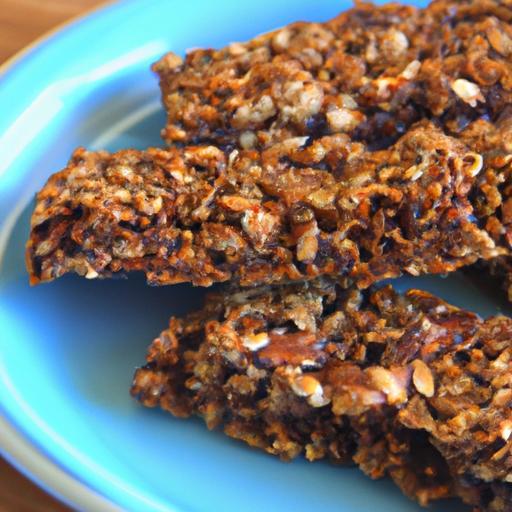
Begin with old-fashioned rolled oats for their hearty texture and slight chewiness,which forms the granola bars’ backbone. Toasting the oats briefly before mixing enhances their nutty aroma and adds a golden crunch. For nuts and seeds,opt for a mix of almonds,walnuts,pumpkin seeds, and sunflower seeds-each contributes a unique crunch and a spectrum of flavors,from buttery to subtly earthy. Granola
When it comes to sweeteners, natural ingredients like raw honey, maple syrup, or agave nectar create a luscious, sticky binding while lending rich, complex notes. Consider adding a pinch of sea salt and a dash of cinnamon or vanilla extract to amplify the overall taste profile. for an extra touch of indulgence, toss in dark chocolate chips or dried fruit like tart cranberries or apricots. Granola
prep and Cook Time
- Readiness: 15 minutes
- Cook & Set Time: 20 minutes + 1 hour cooling
Yield
Makes 12 medium-size bars (approximately 2″x3″ each)
Difficulty Level
Easy – Perfect for beginners and seasoned kitchen creatives
Ingredients
- 2 cups old-fashioned rolled oats
- 1/2 cup raw almonds, roughly chopped
- 1/4 cup walnuts, chopped
- 1/4 cup pumpkin seeds (pepitas)
- 2 tbsp sunflower seeds
- 1/2 cup raw honey or maple syrup
- 1/4 cup natural peanut butter or almond butter
- 1 tsp pure vanilla extract
- 1/4 tsp fine sea salt
- 1/2 tsp ground cinnamon (optional)
- 1/3 cup dark chocolate chips or dried cranberries (optional)
Step-by-Step Guide to Crafting Your Homemade Granola Bars
- Preheat your oven to 325°F (160°C) and line an 8×8-inch square pan with parchment paper, allowing some overhang for easy removal later.
- Toast the oats and nuts: Spread oats, almonds, and walnuts evenly on a baking sheet and toast for 10 minutes, stirring halfway through until golden and fragrant. This step intensifies flavor and enhances crunch.
- In a medium saucepan, gently warm the honey (or maple syrup) and peanut butter over low heat, stirring regularly until smooth and well combined. Remove from heat and stir in vanilla extract, salt, and cinnamon. Granola
- transfer toasted oats and nuts to a large bowl. Add pumpkin seeds, sunflower seeds, and optional dark chocolate chips or dried cranberries.Pour warm honey mixture over and mix thoroughly until every bit is coated and sticky. Granola
- press the mixture firmly into the prepared pan using the back of a spatula or your hands (lightly moistened) to compact it.This ensures the bars hold together once cooled.
- Bake for 15-20 minutes or until the edges turn golden brown. Remove from oven and allow it to cool fully on a wire rack.
- Once cooled,use the parchment paper overhang to lift the granola slab out. Cut into 12 bars with a sharp knife.
Tips for Customizing Your Bars with Nuts, Seeds, and Sweeteners
You’re encouraged to experiment by swapping almonds for cashews or pistachios, or adding chia and flax seeds for an extra nutrition boost. Adjust the sweeteners according to preference – dark molasses or brown rice syrup provide deeper, richer notes. For a vegan-amiable version,replace honey with maple syrup exclusively.
Feel free to incorporate superfood powders like maca or spirulina into your dry ingredients, but add sparingly to not overpower the natural flavors. For added texture contrast, sprinkle toasted coconut flakes on top before baking for a golden finish.
storing and Sharing Your Crunchy Creations for Maximum Freshness
Store your homemade granola bars in an airtight container at room temperature for up to one week. To extend freshness, layer the bars between sheets of parchment paper and keep them in the fridge for up to two weeks. For longer preservation, freeze bars in a sealed bag for up to three months – simply thaw at room temperature before enjoying.
These crunchy bites are perfect for packing into lunchboxes,gifting in decorative tins,or pairing with a hot cup of herbal tea during a cozy afternoon break. Wrap individual bars in parchment paper and tie with twine for a charming homemade gift!
Chef’s Notes: Tips for Success
- For extra stability, add 2 tbsp of ground flax seeds or protein powder to the dry mix.
- If bars seem crumbly, reduce the baking time slightly or press more firmly before baking.
- Use a silicone spatula or wet fingers to press the mixture down to avoid sticking.
- Allow bars to cool completely before slicing to prevent breakage.
- Try swapping peanut butter for sunflower seed butter to accommodate allergies.
Serving Suggestions
Serve your crunchy bars with a drizzle of nut butter and fresh fruit slices for a nourishing breakfast.They also pair beautifully with a smoothie bowl or Greek yogurt topped with honey and toasted nuts. For an indulgent snack,melt dark chocolate for dipping or sprinkle flaky sea salt over the bars just before serving to heighten flavor contrast.

| Nutrient | Per Bar (Approx.) |
|---|---|
| calories | 180 kcal |
| Protein | 5 g |
| Carbohydrates | 22 g |
| Fat | 8 g |
For even more wholesome snack ideas, check out our Healthy Snack Recipes. To learn about the nutritional science behind oats, visit the Harvard T.H. Chan Nutrition Source on Oats.
Q&A
Q&A: DIY Crunchy Granola bars – Your Easy Homemade Snack Recipe
Q1: Why should I make my own granola bars instead of buying them?
A: Making granola bars at home puts the power in your hands! You control every ingredient, meaning no hidden sugars, preservatives, or mysterious additives. Plus, it’s a fun way to tailor flavors and textures to your liking-whether you crave nutty crunch, chewy chewiness, or a chocolatey punch.
Q2: What are the key ingredients for crunchy granola bars?
A: The magic mix starts with sturdy rolled oats,a handful of crunchy nuts (almonds,pecans,or walnuts work great),seeds like sunflower or chia for a nutritional boost,and natural binders such as honey or maple syrup. A splash of vanilla or a pinch of cinnamon adds cozy warmth. Optional extras include dried fruits or dark chocolate bits for bursts of flavor.
Q3: How do I make sure my granola bars come out crunchy and not soggy?
A: The trick is balance! Use dry, toasted ingredients and don’t overload the mix with wet binders. Toast the oats and nuts before mixing for extra crispness. Press the mixture firmly into the pan so it sticks together well, then chill or bake briefly.Letting the bars cool completely before cutting also helps them hold their shape and crunchiness.
Q4: Can I customize these bars to fit dietary needs?
A: Absolutely! For gluten-free bars, use certified gluten-free oats. Swap honey with agave or brown rice syrup for a vegan-friendly option. Nut allergies? Sunflower or pumpkin seeds are fantastic substitutes. The recipe is your playground-experiment confidently to suit your diet and taste buds.Q5: How long do homemade granola bars last?
A: When stored in an airtight container at room temperature, crunchy granola bars stay fresh for about a week. For longer shelf life, keep them in the fridge to maintain their crisp texture for up to two weeks. You can also freeze them individually wrapped for up to 3 months-perfect for pre-made snacks on busy days.
Q6: What’s the best way to enjoy these granola bars?
A: These bars shine as grab-and-go breakfast companions, mid-afternoon pick-me-ups, or post-workout fuel. Pair with a glass of cold milk, a cup of herbal tea, or simply enjoy solo. Their crunchy, sweet, and wholesome profile makes them a snacktime hero anytime you need a quick energy boost.Q7: Any pro-tips for perfect homemade crunchy granola bars?
A: Yes! Try mixing textures-combine chopped nuts with whole seeds for a more captivating crunch. Avoid over-mixing to keep the oat clusters intact. Press the mixture firmly but don’t compact it too much,or it may become hard as a rock after baking. Lastly, don’t skip the cooling step-the patience pays off in crisp, sliceable bars that won’t crumble all over your kitchen.
Ready to roll up your sleeves and create crunchy, delicious granola bars straight from your own kitchen? Let the snack crafting adventure begin!
Final Thoughts
Whipping up your own crunchy granola bars at home isn’t just a crafty afternoon project-it’s a delicious way to take control of what fuels your day. With this easy recipe in your kitchen arsenal, you can experiment with flavors, textures, and wholesome ingredients to craft the perfect snack that suits your taste buds and lifestyle. So next time hunger strikes,skip the store-bought aisle and savor the satisfaction of a homemade granola bar that’s as nourishing as it is indeed crunchy. Happy snacking and happy creating!