
 There’s somthing magical about a perfectly crafted pizza dough-the kind that’s crisp on the outside, tender and chewy on the inside, and alive with subtle hints of fermentation.Unlocking that ideal foundation is where every great pizza begins, yet many home cooks find themselves stuck between store-bought shortcuts and elusive artisanal techniques. Whether you’re a seasoned kitchen adventurer or just starting to explore the world of homemade pies, mastering the art of pizza dough is an essential step toward unlocking bold flavors and unforgettable textures. In this article, we’ll dive into tried-and-true tips, creative tricks, and expert insights to help you craft the perfect homemade pizza dough that will elevate your pizza nights from ordinary to extraordinary.
Unlock Flavor: Crafting Perfect Homemade Pizza Dough Tips
Unlock flavor by understanding the art behind every ingredient and technique that creates an irresistibly chewy and aromatic pizza crust. baking the perfect dough at home transforms a simple meal into an experience of textures and tastes that celebrate the time-honored craft of pizza making. Whether you’re aiming for the rustic charm of a Neapolitan pie or a sturdy New York slice, each step – from flour selection to fermentation – plays a vital role in unlocking the most delightful crust imaginable.
Prep and Cook Time
- Planning: 15 minutes
- Fermentation: 18-24 hours (slow rise in fridge)
- Cooking/Baking: 7-10 minutes at high heat
Yield
Approximately 2 large 12-inch pizza crusts
Difficulty Level
Medium – Requires attention to detail but beginner-kind with practice
Ingredients
- 3 ½ cups bread flour, sifted (high protein content aids in chewiness)
- 1 tsp fine sea salt (for balanced flavor)
- 1 tsp sugar (to help yeast activate)
- 2 ¼ tsp active dry yeast (one packet)
- 1 ½ cups water (cool, around 70°F) to optimize fermentation
- 2 tbsp extra virgin olive oil (adds richness and subtle flavor)
Instructions
- activate the yeast: In a bowl, combine warm water and sugar. Sprinkle yeast over and let sit 5-7 minutes until foamy, indicating readiness to work magic.
- Mix dry ingredients: In a large mixing bowl, whisk together bread flour and sea salt. This ensures even distribution and avoids clumps of salt.
- Combine wet and dry: Slowly pour the yeast mixture and olive oil into the flour. Using a wooden spoon or dough hook, stir until a shaggy dough forms.
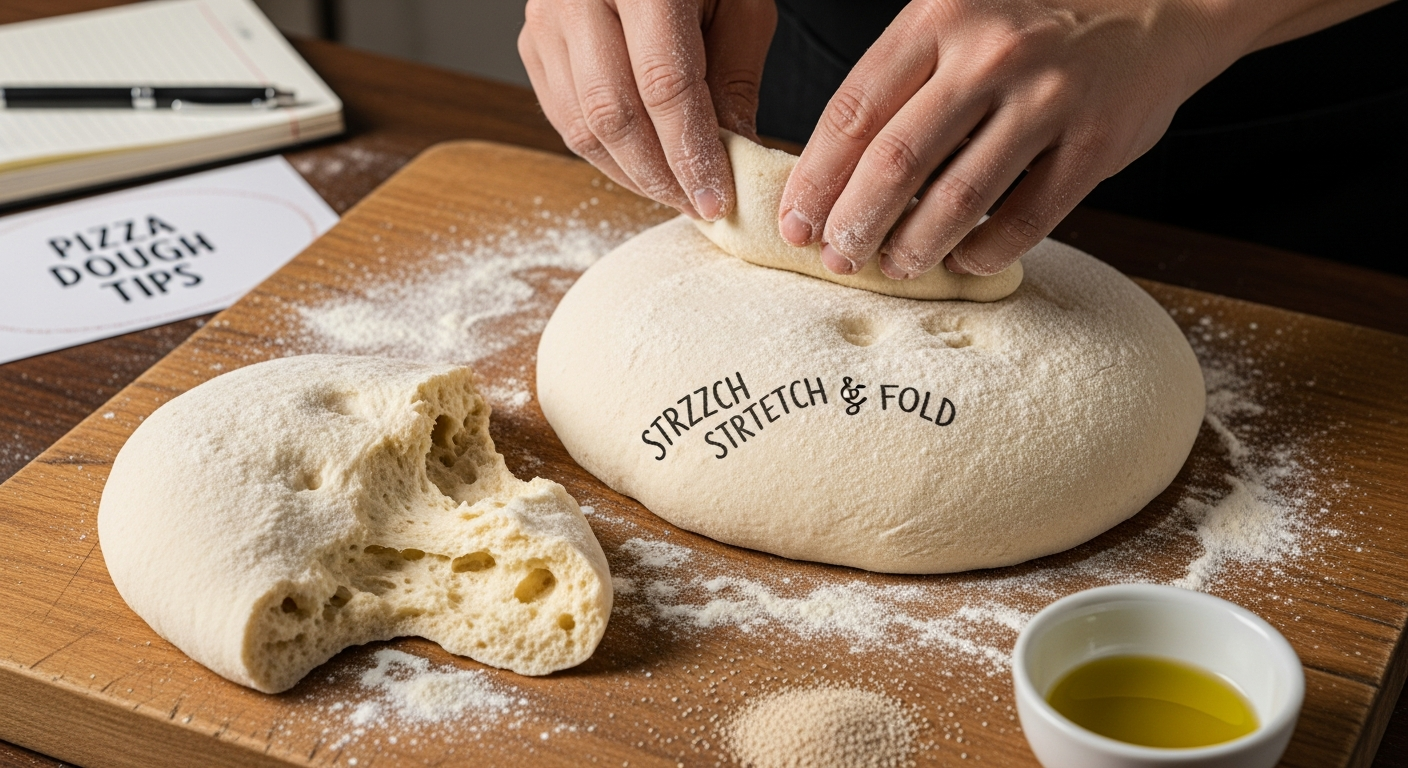
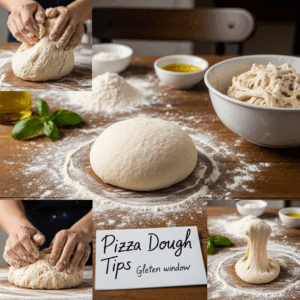
- Knead for chewiness: Turn dough onto a floured surface and knead for about 8-10 minutes until smooth and elastic. Proper gluten development is key to that coveted chewy texture.
- First rise (bulk fermentation): Lightly oil a clean bowl, place the dough inside, cover with plastic wrap or a damp towel.Allow it to rest at room temperature for 1 hour, then transfer to the refrigerator for 18-24 hours for slow fermentation.This step deepens flavor and improves dough extensibility.
- Bring to room temp: Remove dough from fridge 2 hours before baking to relax gluten and ease stretching.
- Perfect hydration practice: If the dough feels too sticky, sprinkle a touch more flour; too dry, add water by the teaspoon. The ideal dough is tacky yet manageable, lending itself to an airy crumb once baked.
- Shaping without deflating: Gently press dough with fingertips to form a small disc, then stretch evenly from the center outward. Avoid heavy rolling pins; use your hands to preserve air bubbles for that light interior texture.
- Preheat oven: Heat to 500°F (or as high as your oven allows) with a pizza stone or steel inside for at least 45 minutes to ensure proper crust blistering and crunch.
- Bake: Add your favorite toppings and bake for 7-10 minutes. Watch carefully as the crust bubbles and turns golden with crisp edges.
Chef’s Notes: Secrets to Unlock Flavor in Dough
- Flour choice: Bread flour’s higher protein forms stronger gluten,perfect for chewiness and structure. For a rustic variation, mix ¼ cup whole wheat or tipo 00 flour for subtle nuttiness.
- Fermentation magic: Patience is your best friend. The slow fridge fermentation generates flavorful organic acids and lets gluten relax, enhancing extensibility without the snap-back common to swift-rise doughs.
- Hydration balance: A hydration level near 65% (water weight vs. flour weight) typically yields the ideal softness and elasticity.Warmer or drier climates may require slight adjustments.
- Shaping tips: Avoid deflating the dough by handling gently. If stretching by hand feels daunting, try a quick “slap and fold” technique to build strength without knocking out air.
- Make ahead: Dough can rest in the fridge up to 72 hours; just bring it back to room temp before shaping. Alternatively, freeze shaped dough balls for up to 2 weeks.
Serving Suggestions
Serve your masterpiece on a wooden pizza peel or stone to echo authentic pizzeria style. Garnish with fresh basil leaves, a drizzle of extra virgin olive oil, and a sprinkle of flaky sea salt to elevate flavors. For paired drinks, a crisp Italian white or a fruity craft beer creates perfect harmony with the crust’s richness and your choice of toppings.

| Nutrient | Per Serving (1 crust) |
|---|---|
| Calories | 290 |
| Protein | 9g |
| Carbohydrates | 58g |
| fat | 3g |
For more advanced pizza dough techniques and toppings, explore our Artisan pizza Toppings Guide. For scientific insights into yeast fermentation, the ScienceDirect Food Science Portal offers extensive details.
Q&A
Q&A: Unlock Flavor – Crafting Perfect Homemade Pizza Dough Tips
Q1: Why does making homemade pizza dough matter when I can just buy pre-made dough?
A1: Crafting your own dough unlocks a world of flavor and texture that store-bought options frequently enough miss. When you make dough from scratch, you control every ingredient and process, allowing for a crust that’s crispy on the outside, chewy inside, and bursting with fresh taste-a true canvas for your favorite toppings.
Q2: what’s the secret to a dough that’s both soft and crispy?
A2: It’s all about balancing hydration and fermentation. Using the right amount of water keeps the dough tender, while a slow, cold fermentation (think refrigerated for 24-72 hours) amplifies flavor and creates that delightful crispness when baked at high heat. Don’t rush it-good things come to those who ferment!
Q3: Can I use different types of flour to change the flavor or texture?
A3: absolutely! All-purpose flour is a trusty staple,but experimenting with bread flour,which has higher gluten,can give your dough more chew. For a nuttier taste and rustic feel, try blending in some whole wheat or semolina flour. Each flour variety introduces its own personality to your pizza crust.
Q4: How important is yeast, and can I substitute it?
A4: Yeast is your dough’s magic maker-it creates bubbles that make your crust airy and delightful. Instant or active dry yeast works well, but if you prefer a natural approach, try sourdough starter for a tangy twist. Just remember, slower fermentation with less yeast often means richer flavor.
Q5: What’s the ideal way to knead pizza dough?
A5: Kneading develops gluten, the network that gives dough structure. You can knead by hand or with a mixer until the dough is smooth and elastic-typically about 8-10 minutes. if you poke the dough and it bounces back slowly, you’re on the right track.
Q6: Do I really need to let the dough rest?
A6: Yes! Resting, or proofing, allows gluten to relax and yeast to do its work. This means easier stretching and better texture.Whether it’s a quick 1-hour rise at room temperature or a slow overnight chill, patience here pays off in every delicious bite.
Q7: How do I store leftover pizza dough?
A7: Wrap it tightly in plastic wrap or place it in an airtight container,then refrigerate for up to 3 days-or freeze it for longer storage. When ready,bring it back to room temperature before shaping to regain elasticity.
Q8: Any tips for rolling out dough without it sticking or tearing?
A8: Lightly flour your surface and hands, but not excessively, to avoid toughening the dough. Gently press and stretch rather than rolling aggressively.For an even stretch, work from the center outward, rotating the dough as you go.
Q9: What baking techniques make a world of difference for the final crust?
A9: High heat is king! Preheat your oven to its maximum setting-450°F to 500°F (230°C to 260°C)-and use a pizza stone or steel if possible. These tools mimic a pizza oven floor, providing intense bottom heat for that signature crisp. Also, bake quickly and watch closely to capture perfect golden spots.
Q10: How can I infuse extra flavor into my dough?
A10: Don’t be shy with additions! A pinch of garlic powder, fresh herbs like rosemary, or a drizzle of olive oil kneaded in can elevate your crust. Even a splash of honey or malt syrup feeds the yeast and creates a beautifully browned, flavorful crust.
Unlocking the secrets of perfect homemade pizza dough is a journey worth savoring. With these tips in hand, your kitchen will soon fill with irresistible aromas and your taste buds will thank you slice after slice!
In summary
As you pull your perfectly golden, bubble-kissed pizza from the oven, remember that the magic truly starts long before the first slice is served. Crafting the ideal homemade pizza dough is an art rooted in patience, quality ingredients, and a touch of love. With these tips in your culinary toolkit, you’re no longer just making pizza-you’re unlocking a world of flavor and texture that transforms every bite into a celebration. So, roll up your sleeves, embrace the dough’s rhythm, and let your kitchen become the birthplace of your signature pizza masterpiece. After all, great pizza starts from the ground up-one perfect dough at a time.